
OK BABY – Chinese Candy Cab Restoration.
Delivery (By Martin Deliveryman)
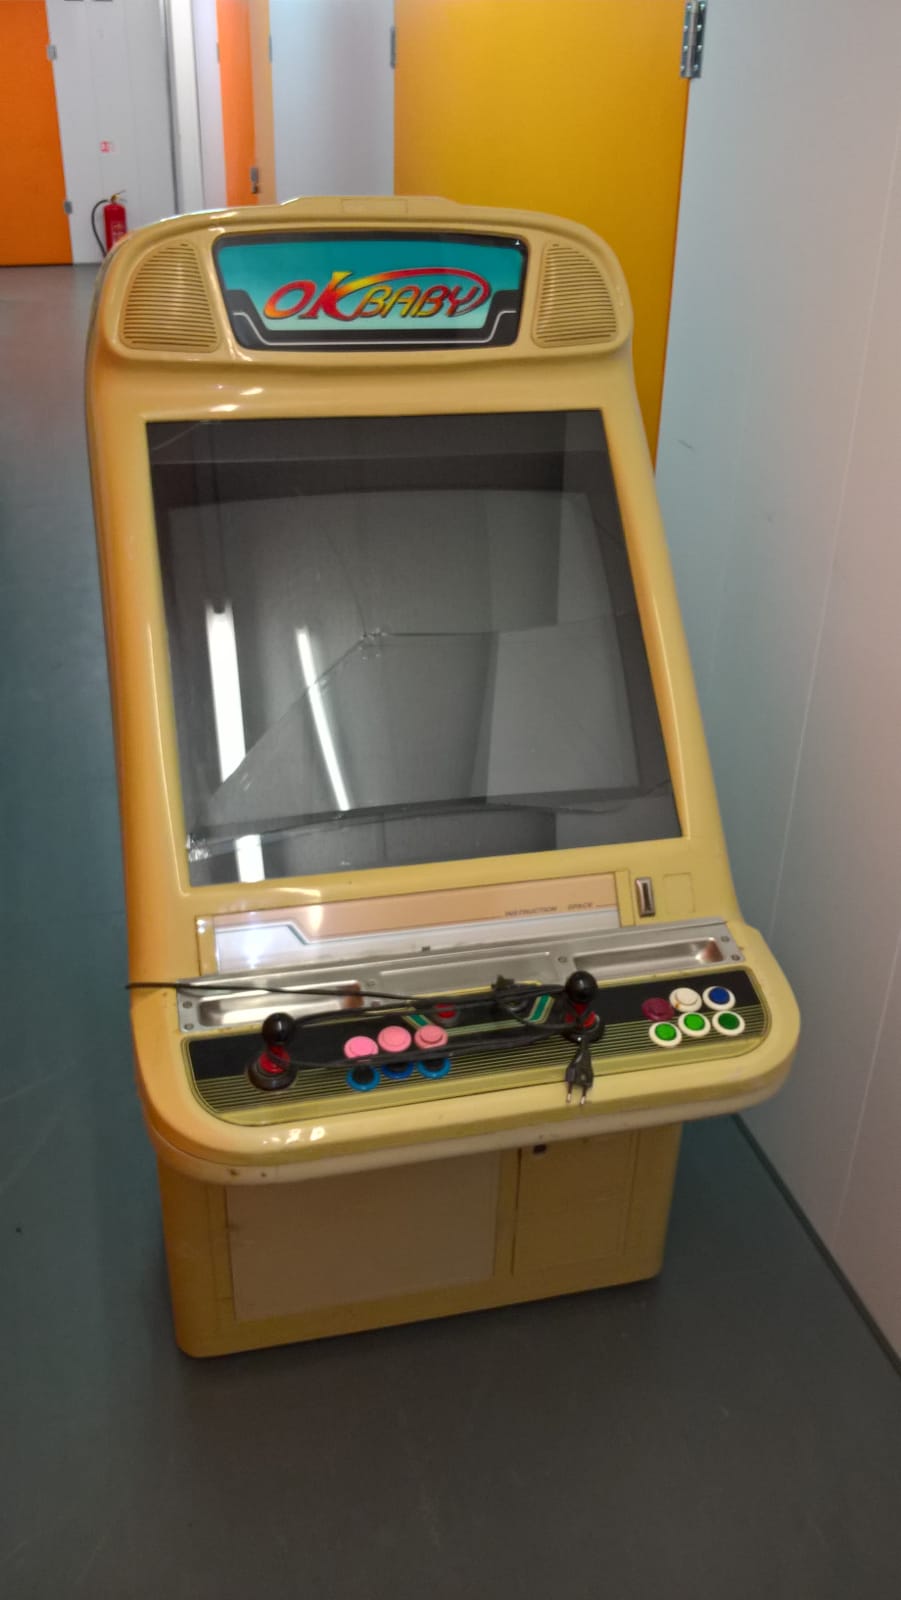
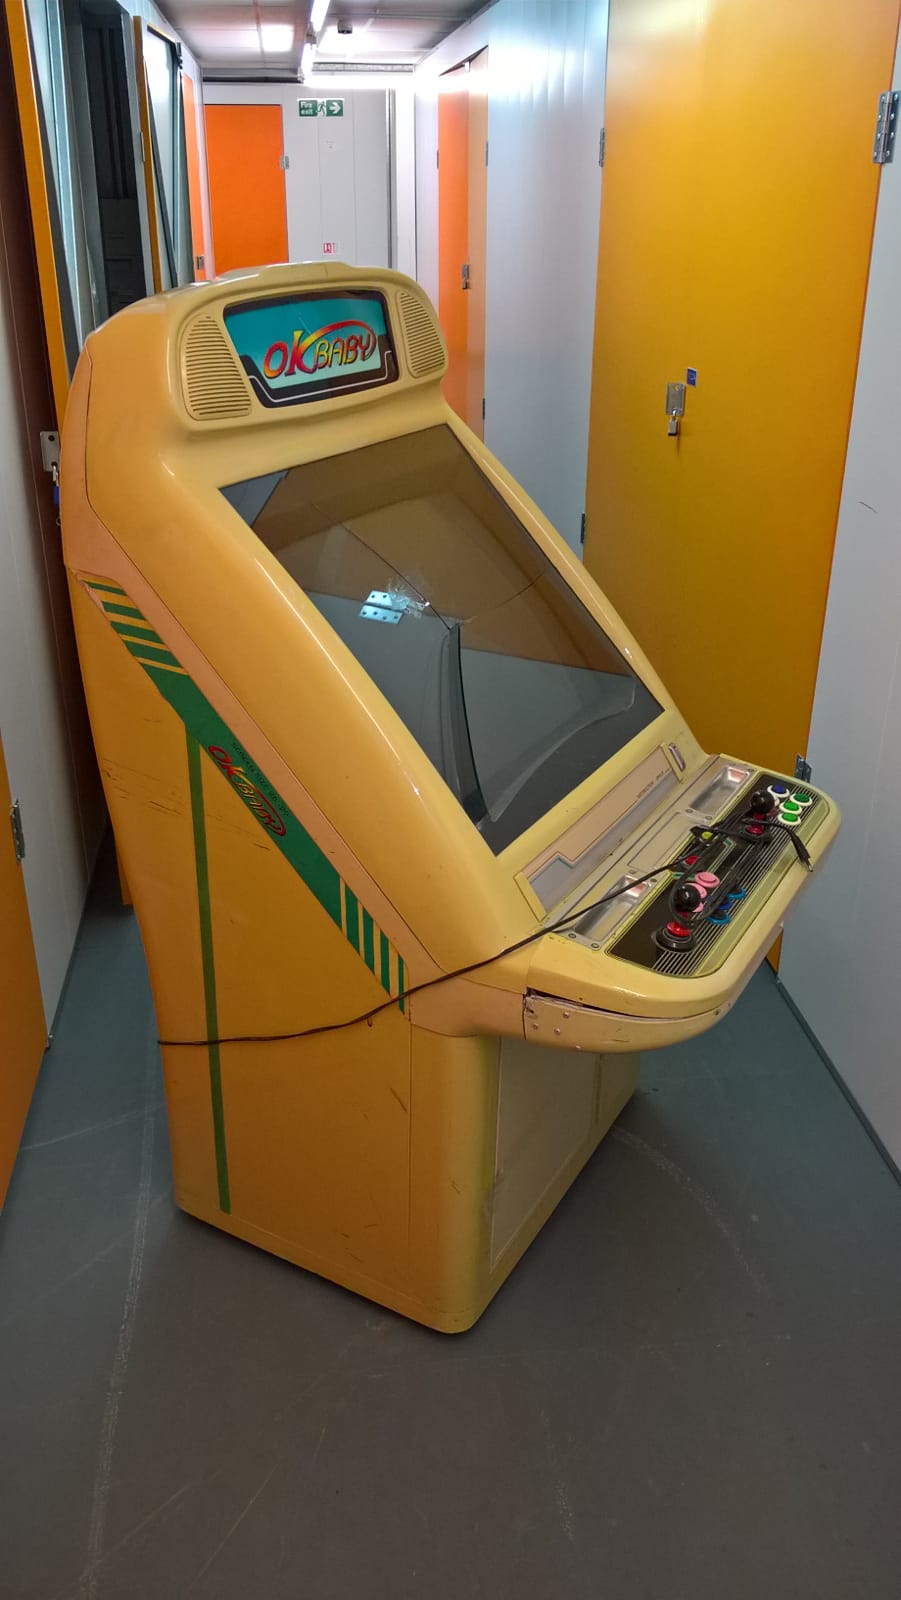
On first looks, this thing looks like it’s had a really hard life. Ugly looking thrown together control panel, missing locks,broken glass EEK! (No.1) sellotape holding doors on, frayed mains lead and cracks. Oh, the cracks!
Looks like it’s had a frankenstein type of repair done on the left hand side of the control panel at some points, as I could see RIVETS on the side of the plastic.
One quick thing before I headed off back to work, cheecky look inside the front door (that had a key in the lock) – A FREE Xbox (the original big black thing) and an xbox to jamma adapter! I did also notice that the monitor chassis was hanging by it’s wires. EEK! (no.2)

First steps in restoring to at least a half decent degree.
I know, I’ll bring the thing into the house where I can have loads of room to work around it. Rather than squeezing my 6’2″ ass into a corner or up against other cabs like I normally do. Took me half an hour to get the control panel off, as it wouldn’t fit thru an indoor doorway. I then find it STILL won’t fit thru the bleedin’ door sideways, with the panel OFF. Jeez, best I squeeze myself back in the garage, where I probably belong. *sigh*
Got in from work, same day as delivery and decided to have a quicklok at what’s what and try and remove the scary looking big ass shards of glass before they injure someone (spoiler – me) The front of the cab lifts up on hinges like a car bonnet (US – hood) and has some fine bonnet catches to hold it up on it’s own. However, these catches were attached to brackets that were attached to the plastic front and held in the glass and plastic monitor bezel. I was futzing around holding the thing up and trying to undo the brackets and jimmy the glass out, but I got a wee bit scared and decided to take the whole front off the hinges, just in case any of those big lumps of glass came out and slashed my face off.
This made things way easier and less scary. I’ve decided not to replace the broken glass, as some candy cabs don’t have bezel glass. I’ll have to pad out the space between cab front and plastic bezel, so the brackets do their job correctly though. We’ll see how it looks…
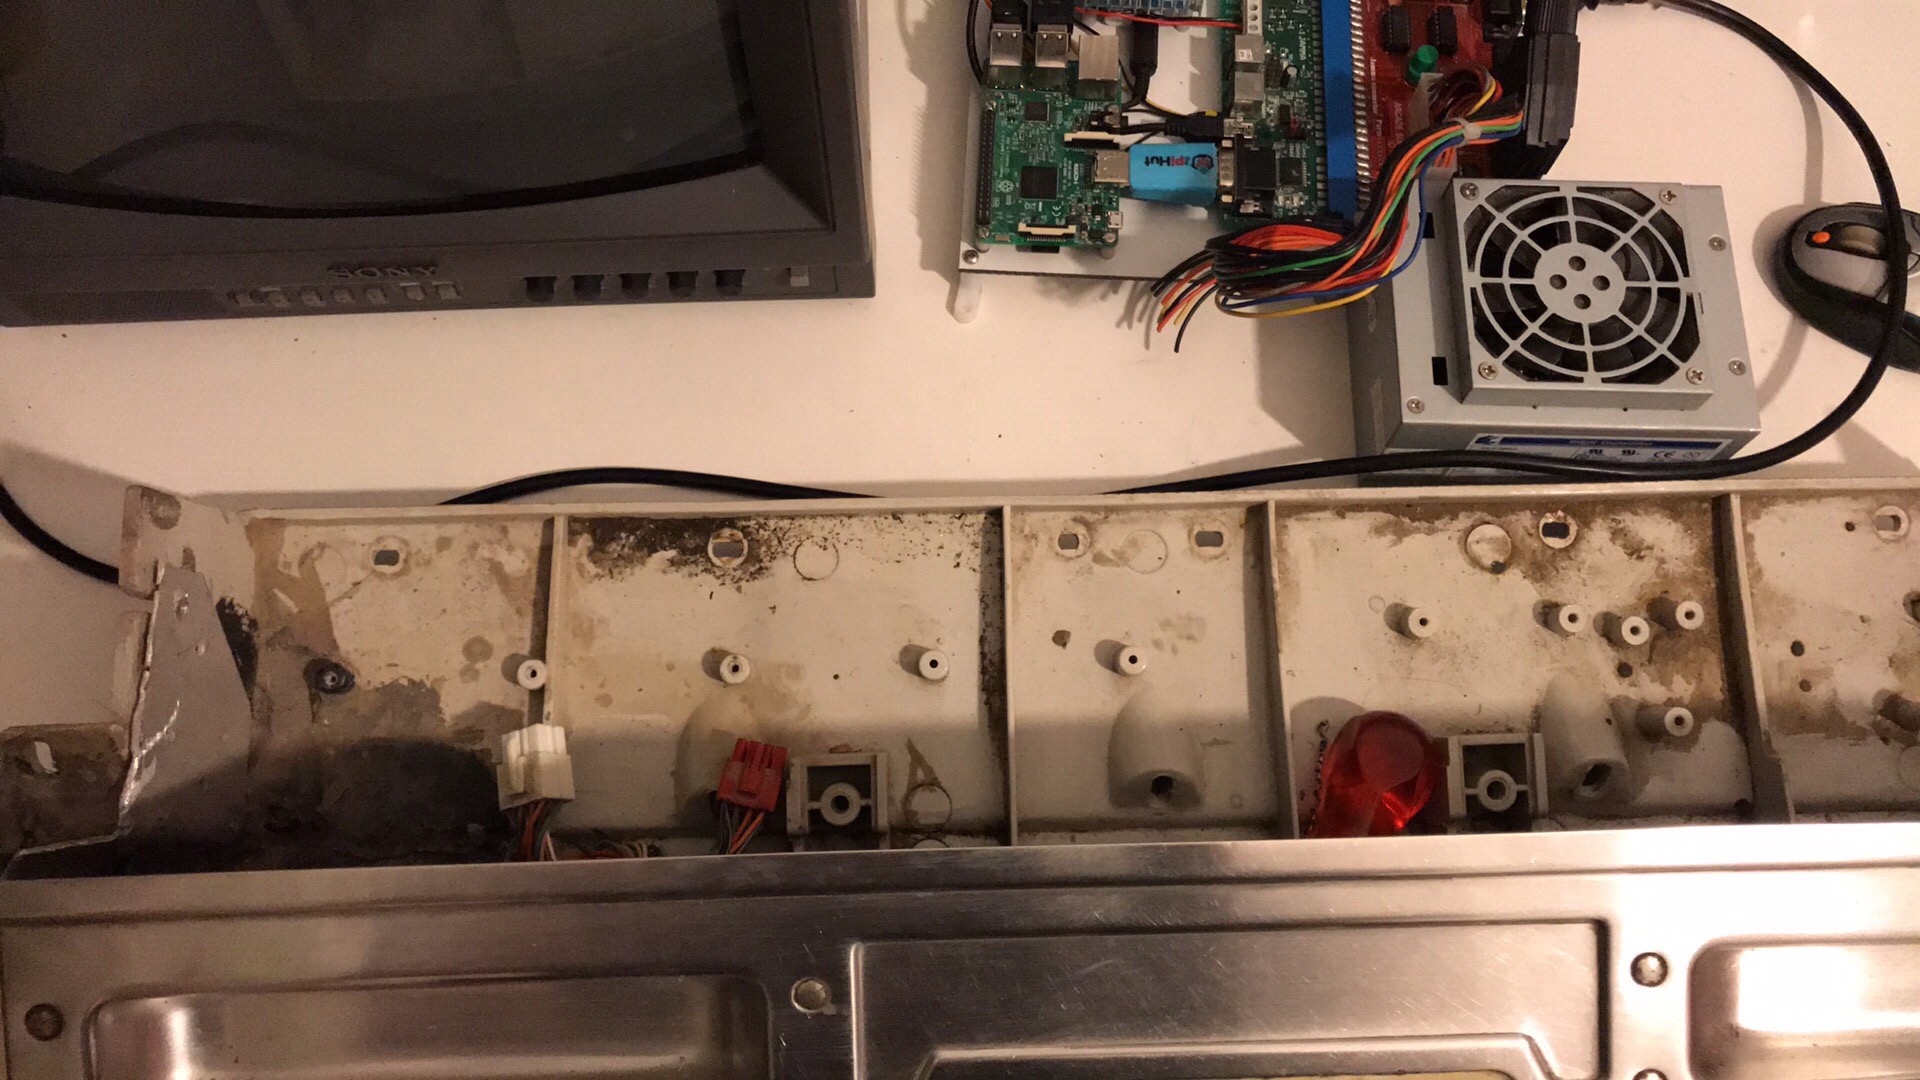
I had a quick glance at the electrics and they weren;t in the best of shape (frayed wires inside and a worn AC cord, with a European plug, which will not fit in oour British outlets. However, this all plugged internally into another kettle lead (3 pronged pc cable to anyone outside of the UK) So, I can just plug directly into that, which inturn gets knocked down to 100v for the monitor and switching power supply. I did also mount the chassis back onto the monitor frame and secured it with 2 screws, which weren’t anywhere to be seen, so I suppose a lazy op just laid it on the frame and hoped for the best…
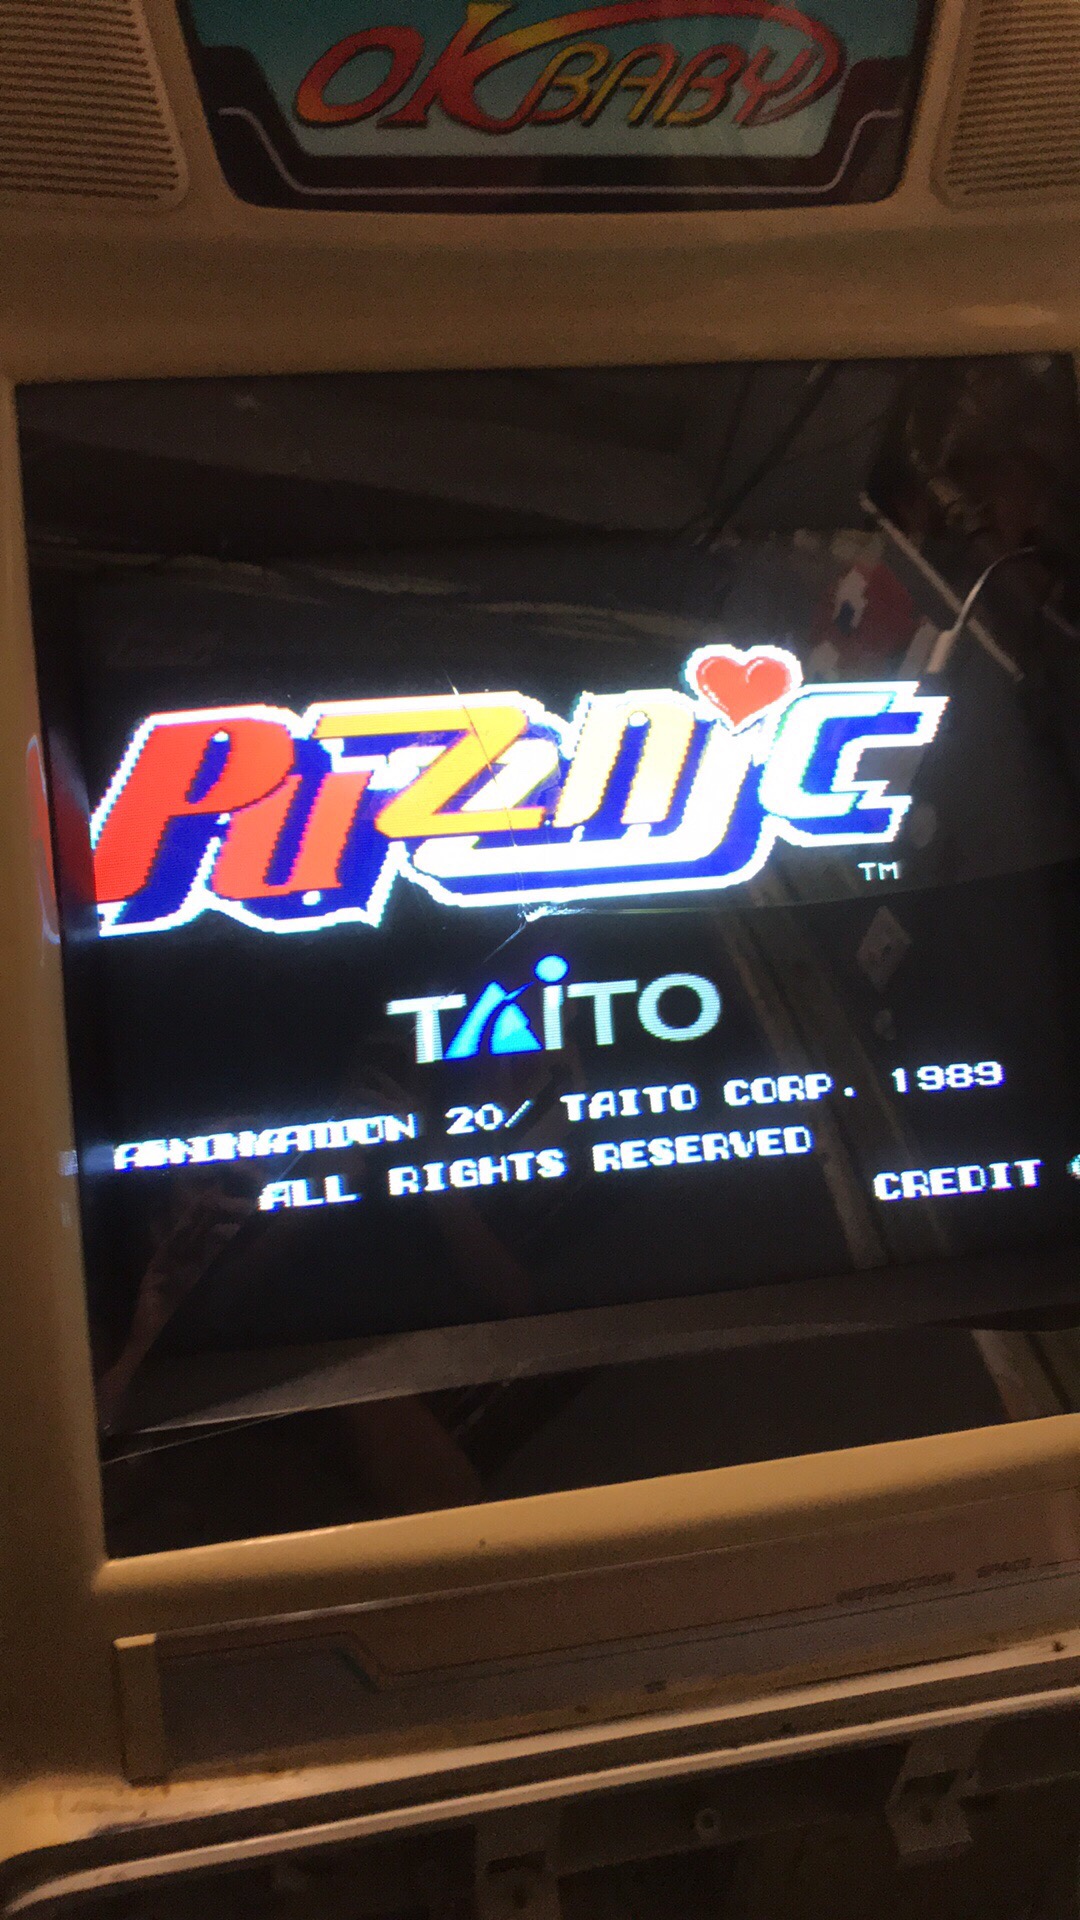
I fitted a crappy puzzle pcb into the jamma harness and carefully powered it on. Fingers crossed!
The screen lit up and I could see the game running, but there were a few lines on the screen, it needed adjusting etc and then it went into vertical collapse. Arses. I powered off, then back on and same again. I did this once again, but started adjusting the remote pot board and it stayed on. Phew. Probably just a glitch on one of the pots. I’ll reflow them with solder at a later date, just in case. The picture is bright and colour ful and the tube has zero burn. Both good points, but there were retrace lines on screen and I couldn’t quite adjust it to my liking, so, hopefully over the weekend I can pull the chassis and give it a much needed cap kit.
TEAR DOWN!
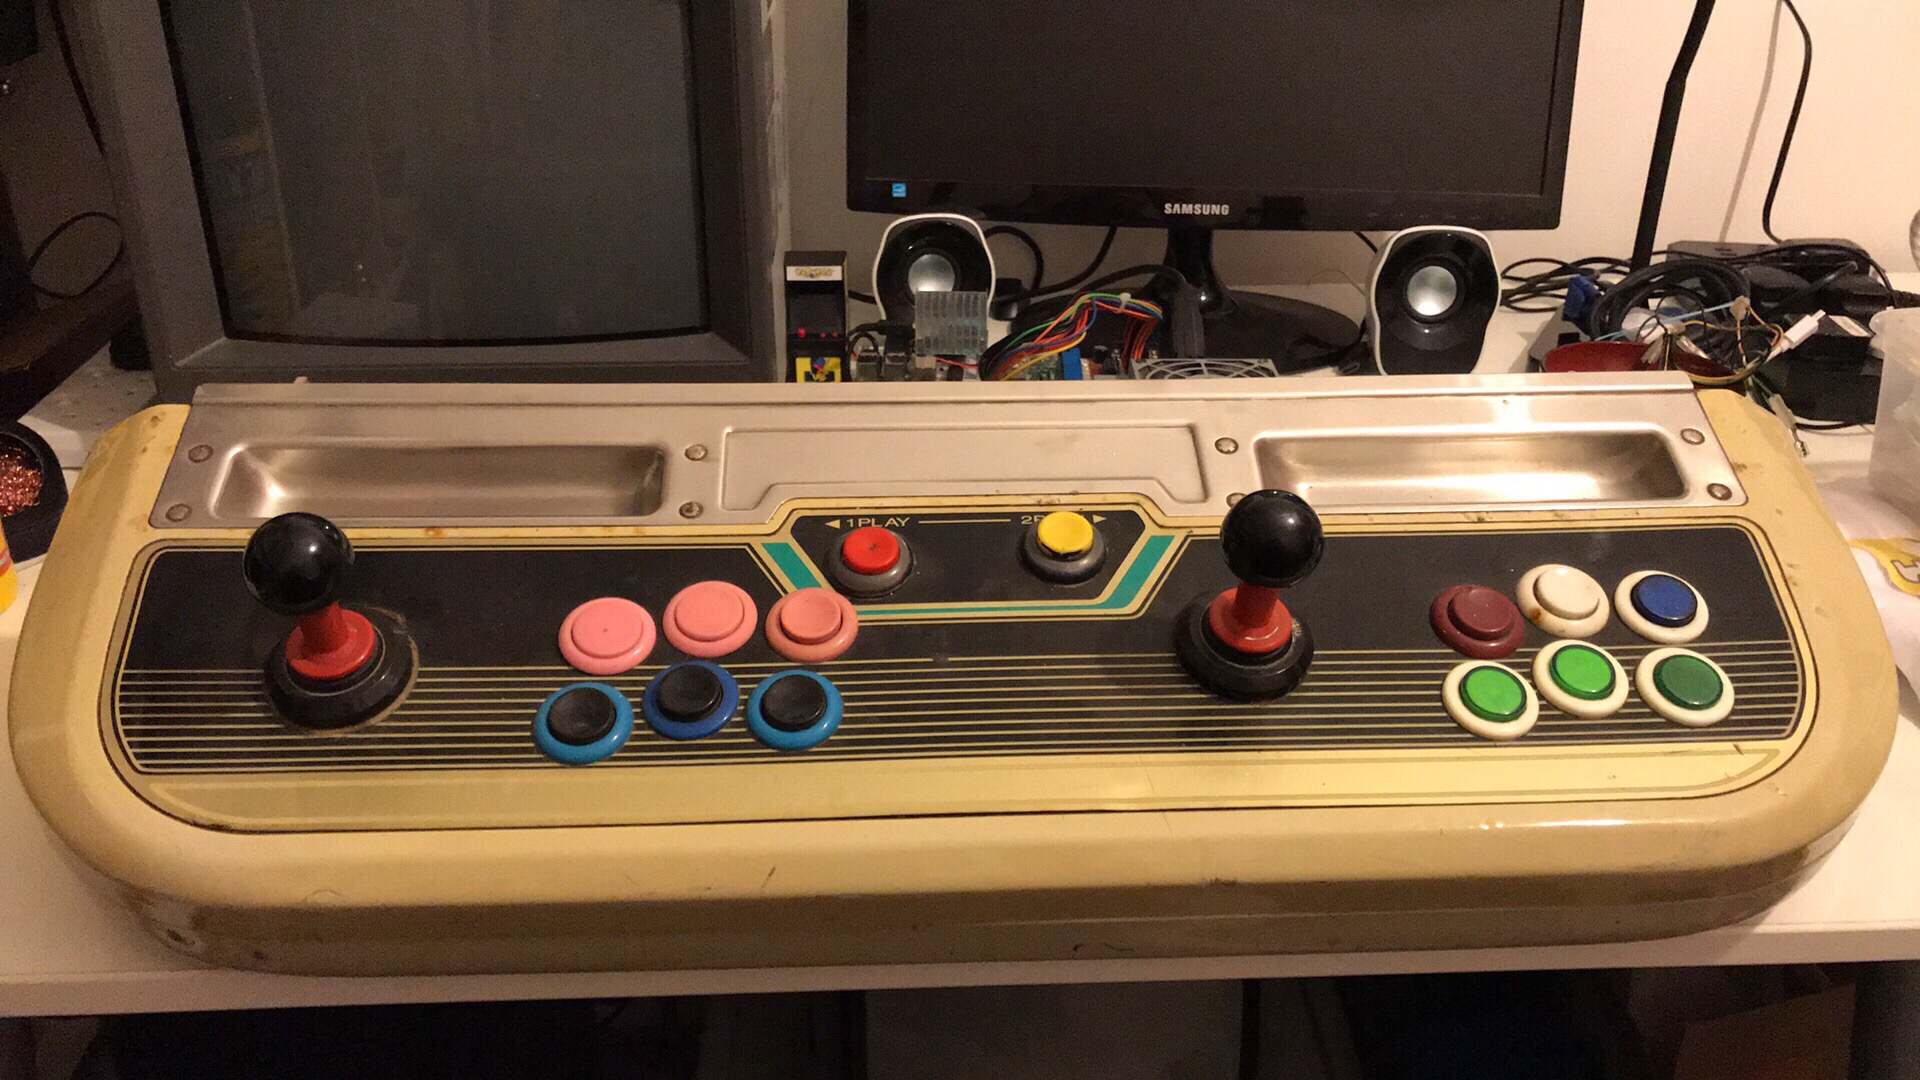
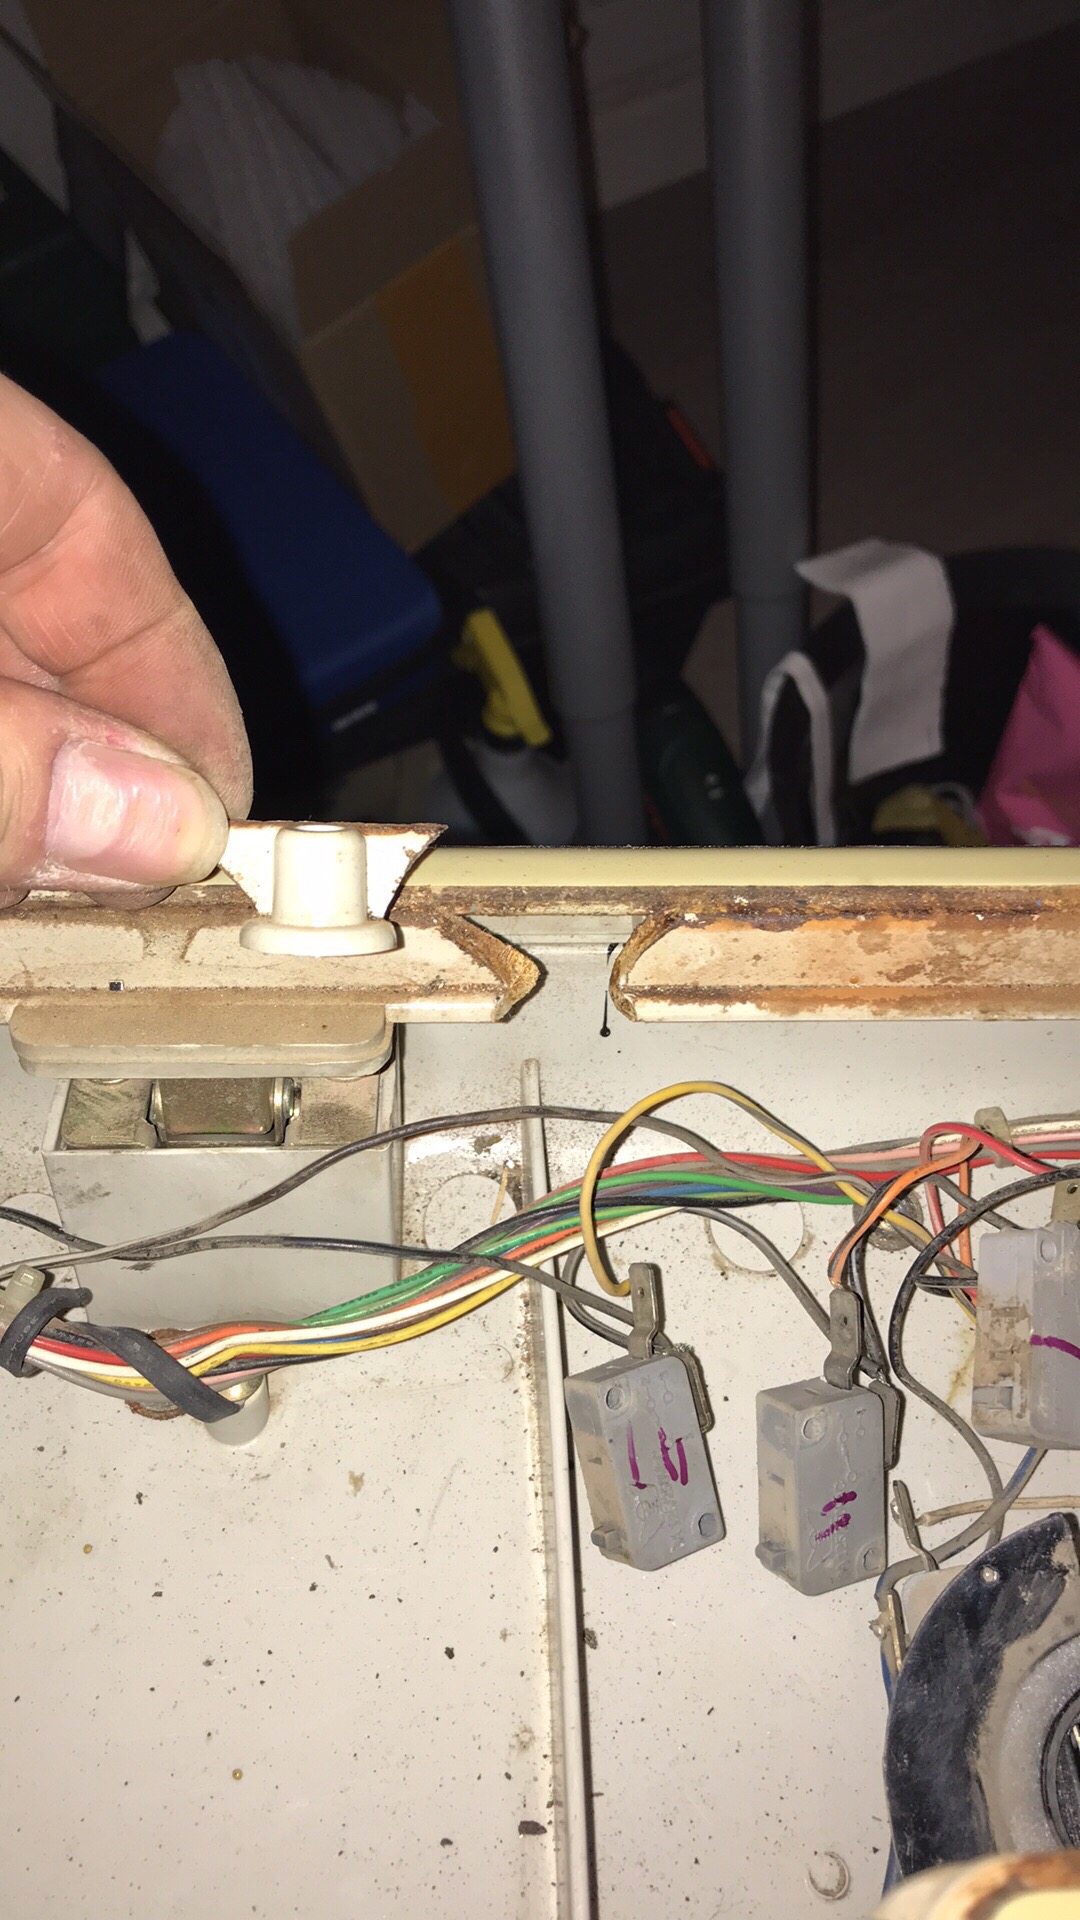
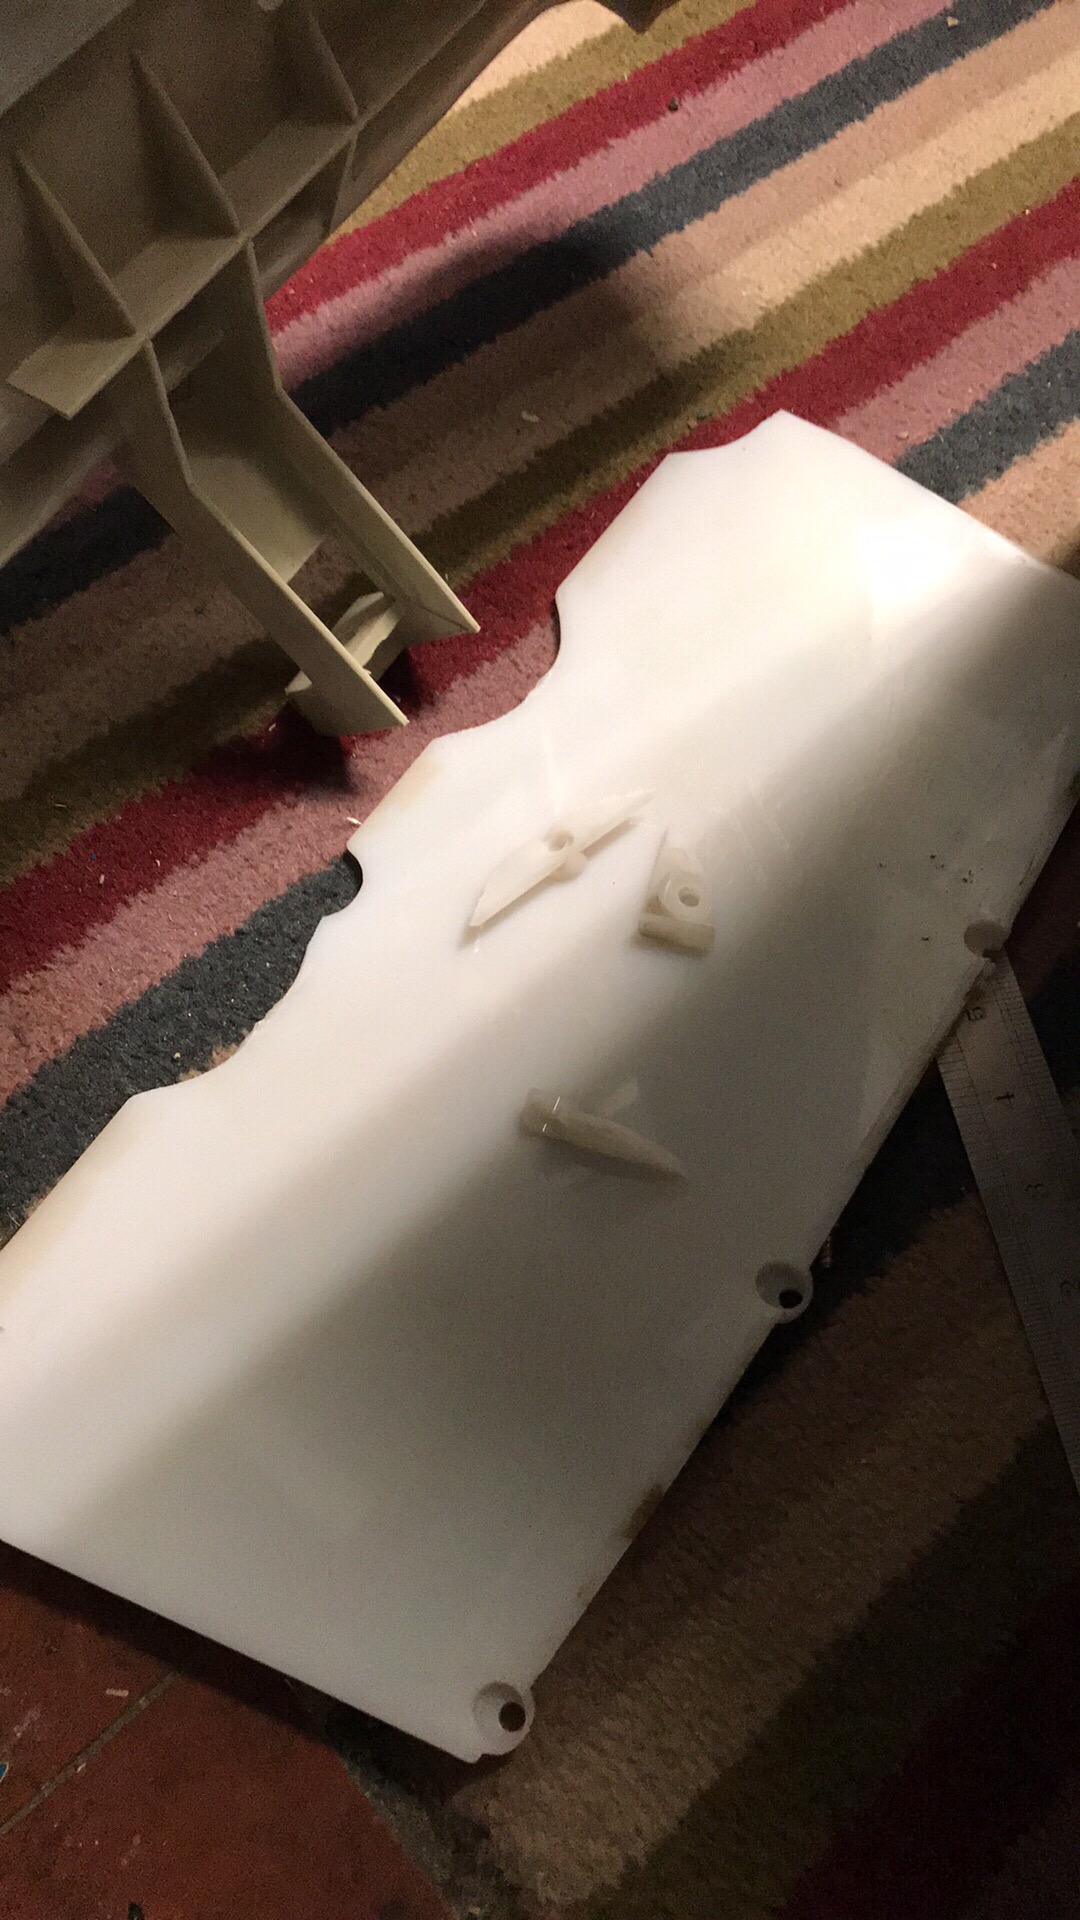
Took the control panel bucket and control panel off for a deep clean (borrowing a jet washer on Sunday) and to make a new control panel, as the person it may be going to is a lonely shooter and wants a single player setup. The buttons are all over the place and most need throwing in the trash bin. I also took out the marquee sign as it felt ‘lumpy’ under the thin plastic material. I knew what was going to be under it – broken pieces of the plastic that holds it in place. Gorilla glue required! The control bucket was going to need something a bit more substantial. I’ll have to break out the epoxy resin or even go all out and get some kind of fibreglass repair kit? The bucket had already been repaired in it’s former life with an ugly aluminium bracket riveted thru the side of it.
Did I mention how filthy it was inside? Well, it is – tons of dirty brown dusty crud fell all over me when I finally pulled the control panel off. It almost looks like some kind of sandy muddy dust?
The joysticks were also held in place not just by the screw in feature of the actual sticks, but wood screws driven into the side of the thread of the joystick on an angle. Ugly and probably futile. Why didn’t they just incase the whole lot in amber and have done with it?

Testing the freebie
I found a 2 pin AC cord and tried out the xbox with the included jamma adapter on a supergun (can’t get to my regular cabs as the STOOPID CANDY IS IN THE WAY!)
It spun up and I got an error 12 on the screen – some guff about contact the vendor to moan about it not working or something. A quickie Googly and found it’s a common fault with these old behemoths. I whipped the foot long screws out the bottom of it and reseated the DVD cable and it sprang to life, although none of the controls were working and it didn’t appear to have any red on the screen. I gave the edge connector a swift wipe down with some fine wet n dry and it looked better on next boot. It has been soft modded somehow and there are a few games on there. Including a KOF. POW!

This final post has been a long time coming. Mr Holley graced my abode with his royal self about a month ago to pick his Baby up and also my Naomi for ‘our’ Lewis. The original monitor AND the freebie modern monitor went with it, to be fixed by the wizard tech at arcade club.
Both monitors were fixed within a week!!!
So – onto the massive UKVAC party / podcasters get together at Arcade Club, where I took up Galloping Ghost’s former GAMER OF THE YEAR Pete Hahn and his lovely wife Christin (luckily the decided to visit the UK when this was on!). The plan was to do a whole day and most of the night at arcade club and I stayed at L’Hotel De Holley, so I could get an early start on fitting the newly repaired monitor in the cab (with bacon sandwich). You wouldn’t let Holley at it on his own, with his jammy fingers, now would you? Monitor in, quickie credit button added and his favourite game and you get this –
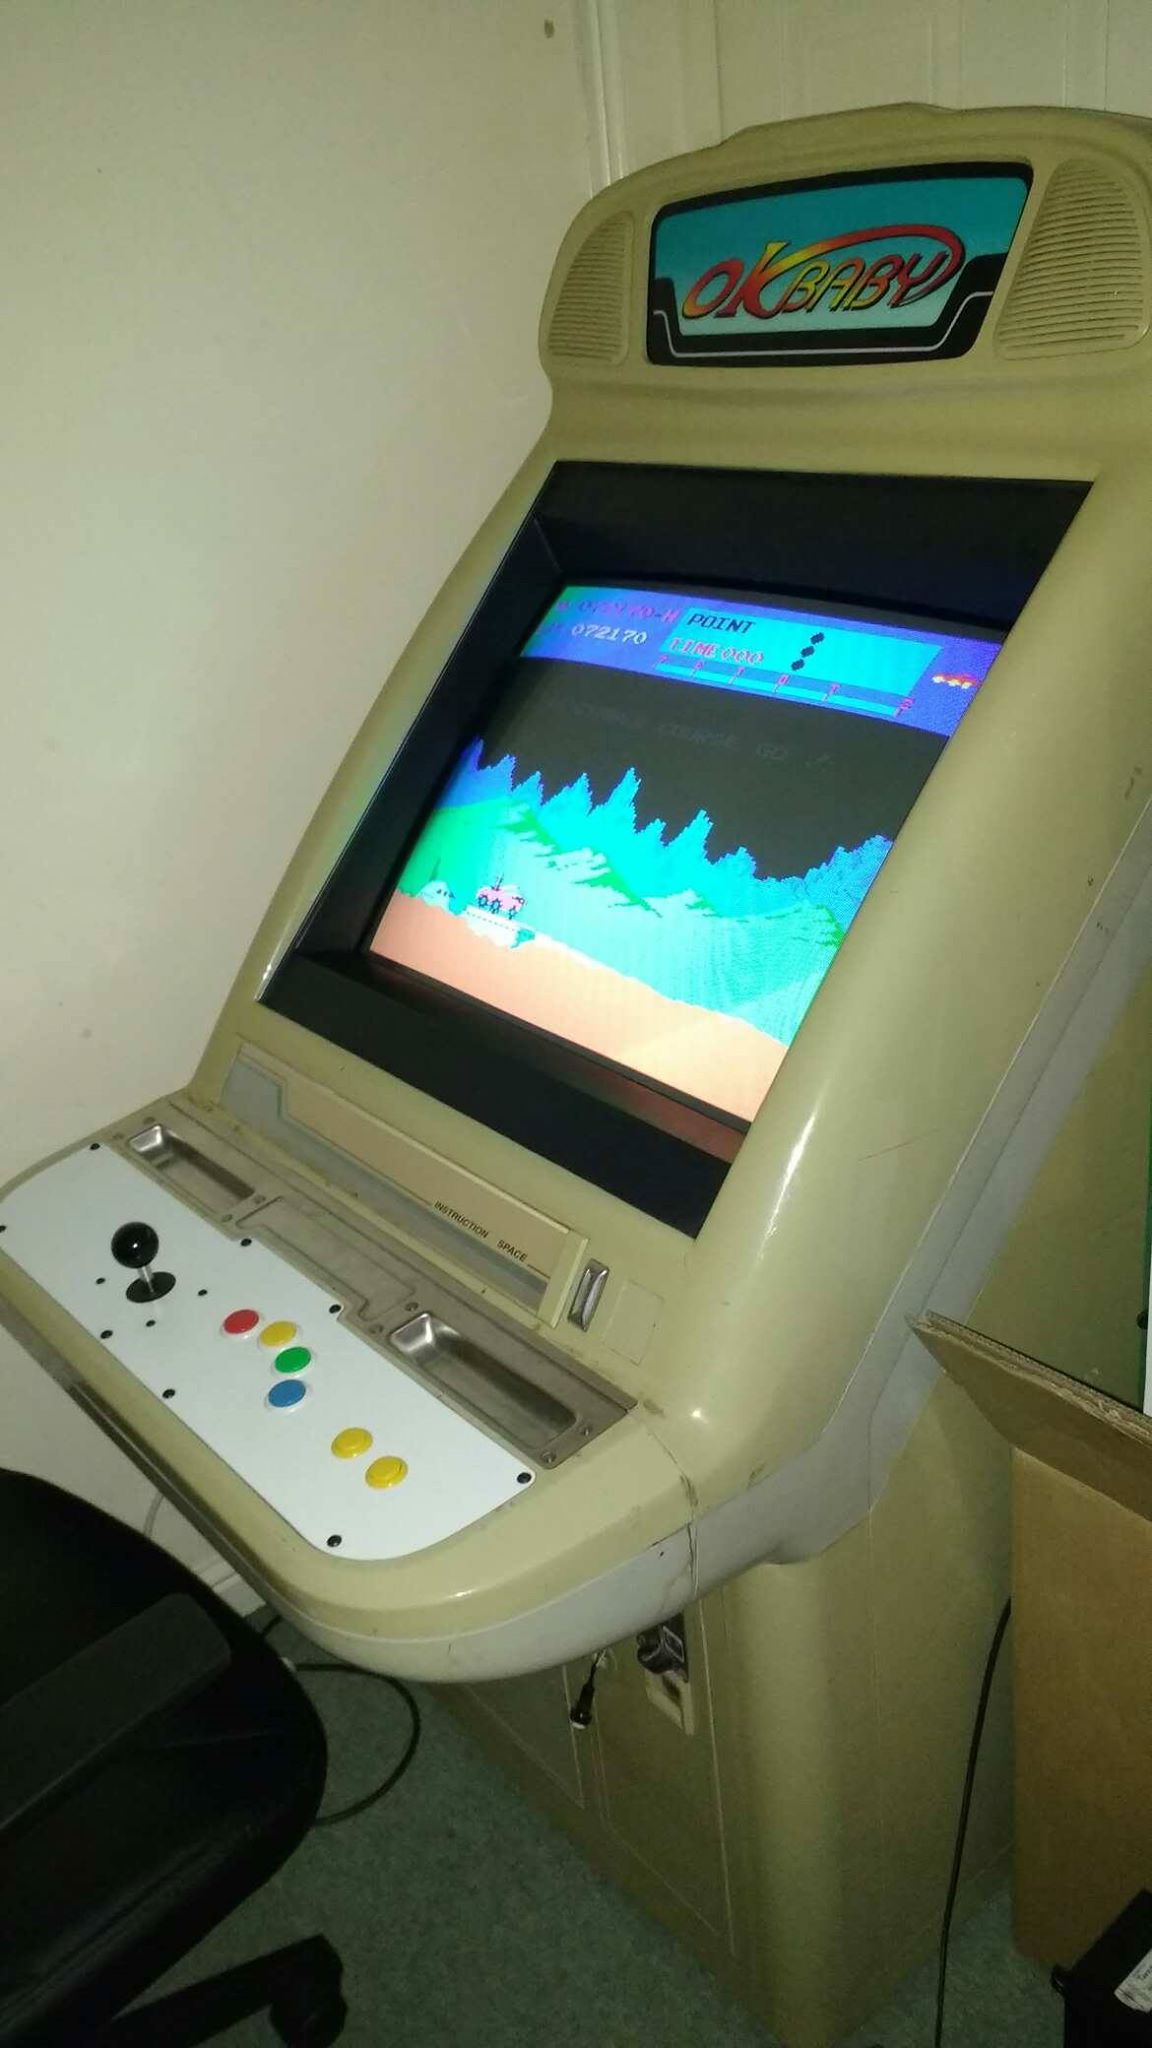
-THE END-